Importing files from NeLS Storage
1 / 5
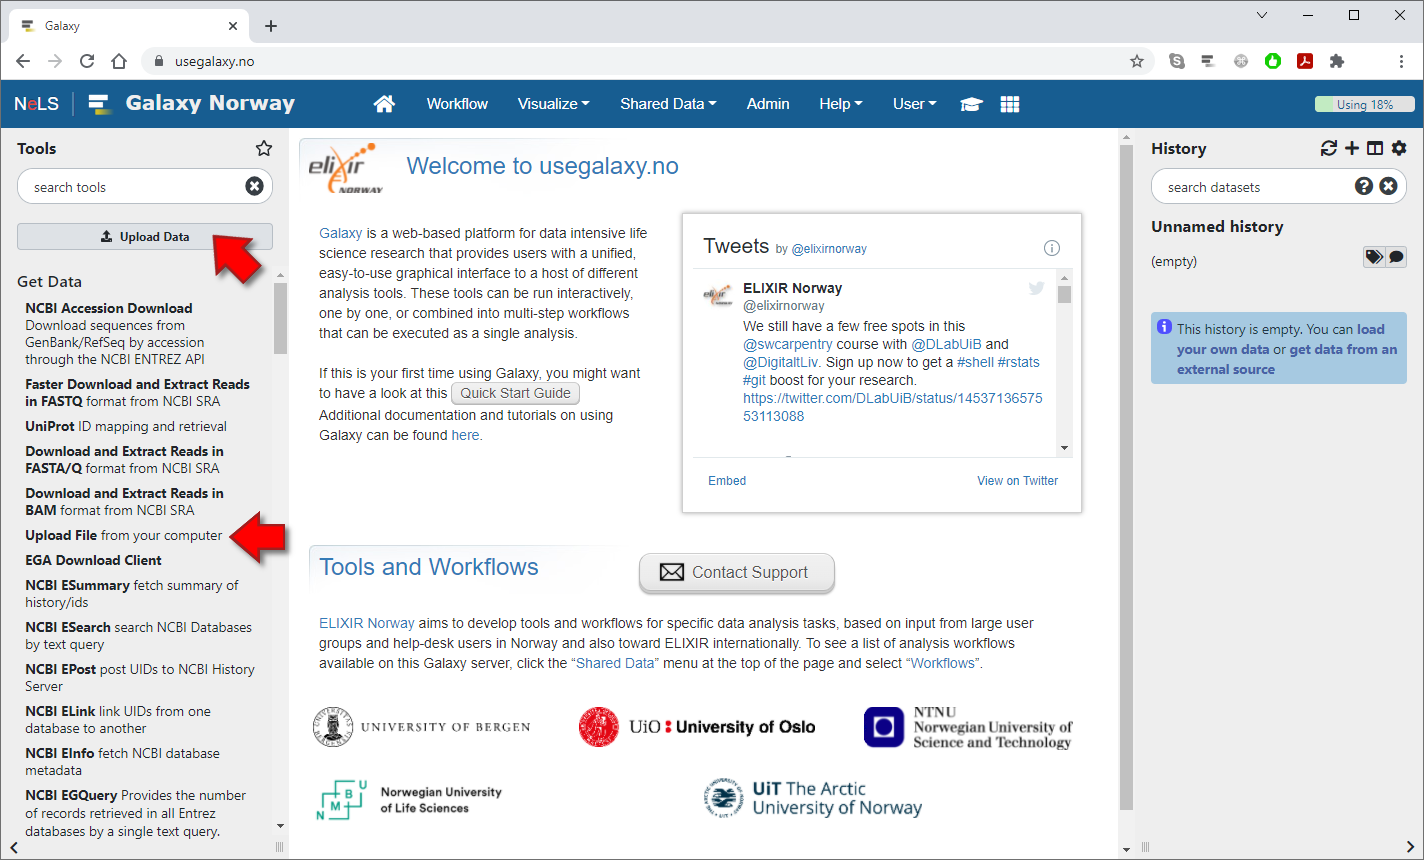
Import files from NeLS Storage by clicking the "Upload Data" button or select the "Upload File" tool.
2 / 5
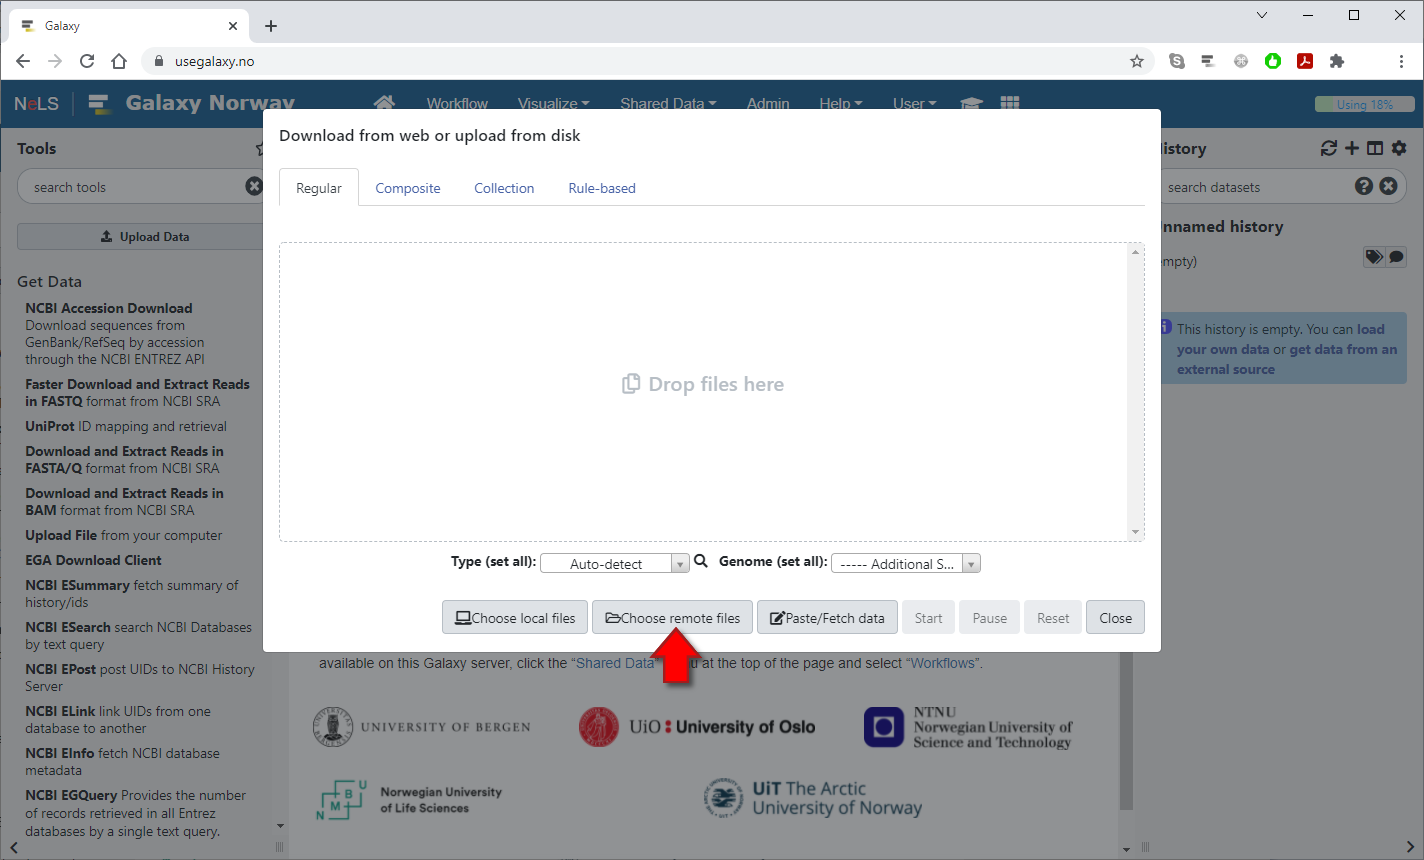
Press the "Choose remote files" button at the bottom of the popup dialog
3 / 5
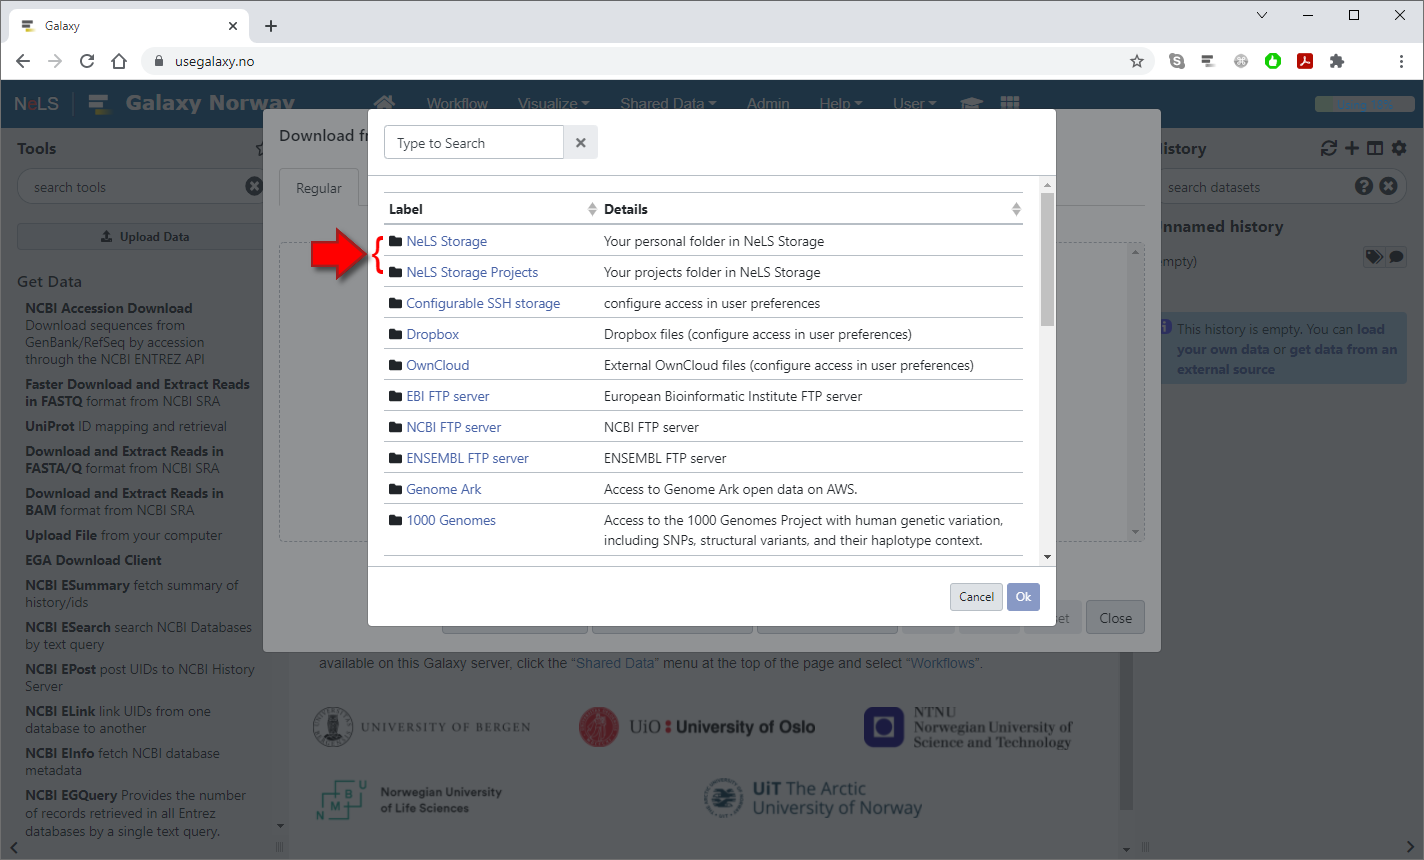
Select "NeLS Storage" or "NeLS Storage Projects" to import files from either your Personal folder or your Projects folder in NeLS
4 / 5
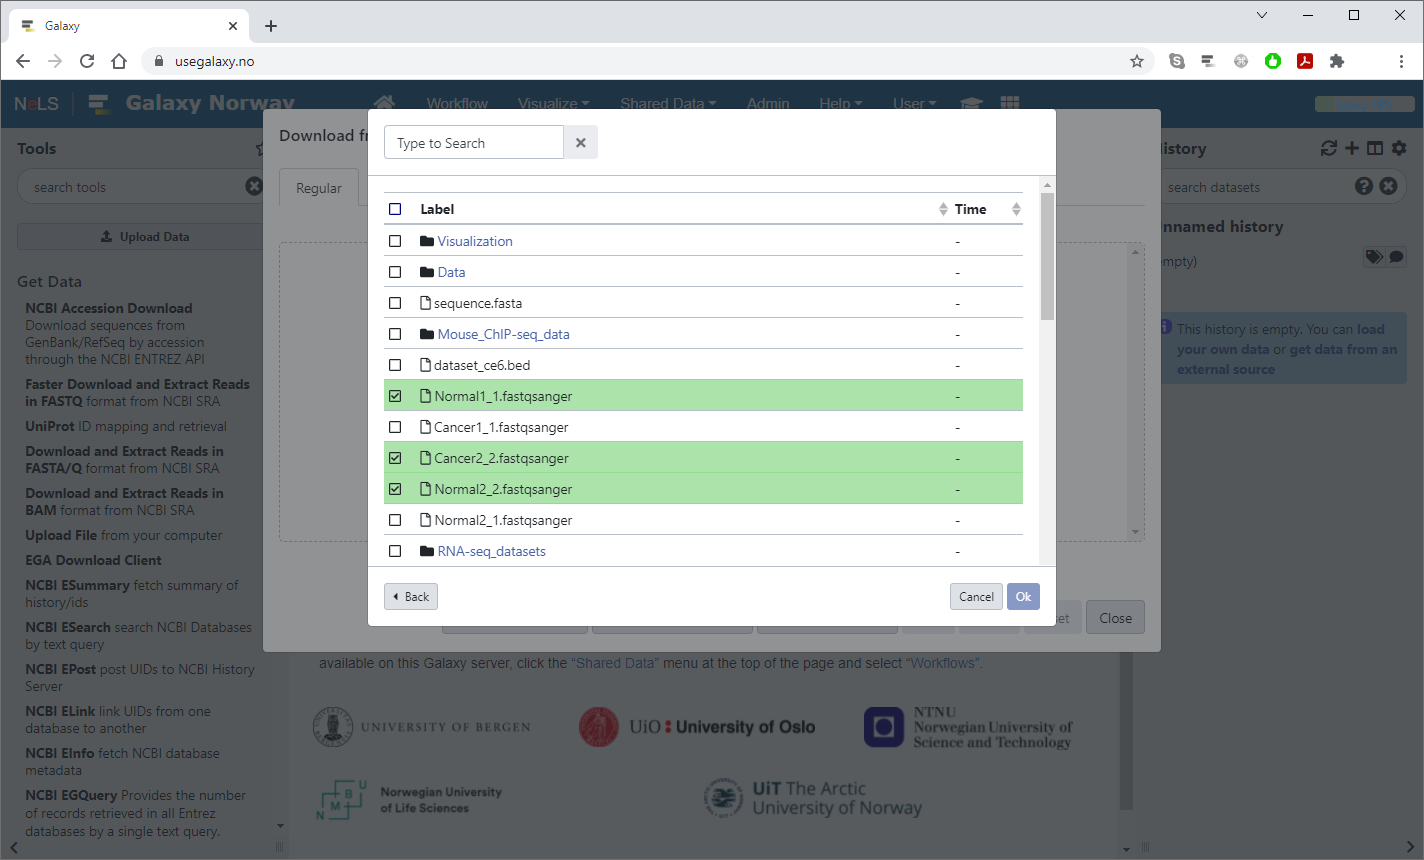
Choose which files you want to import (shown in green) and then press "OK"
5 / 5
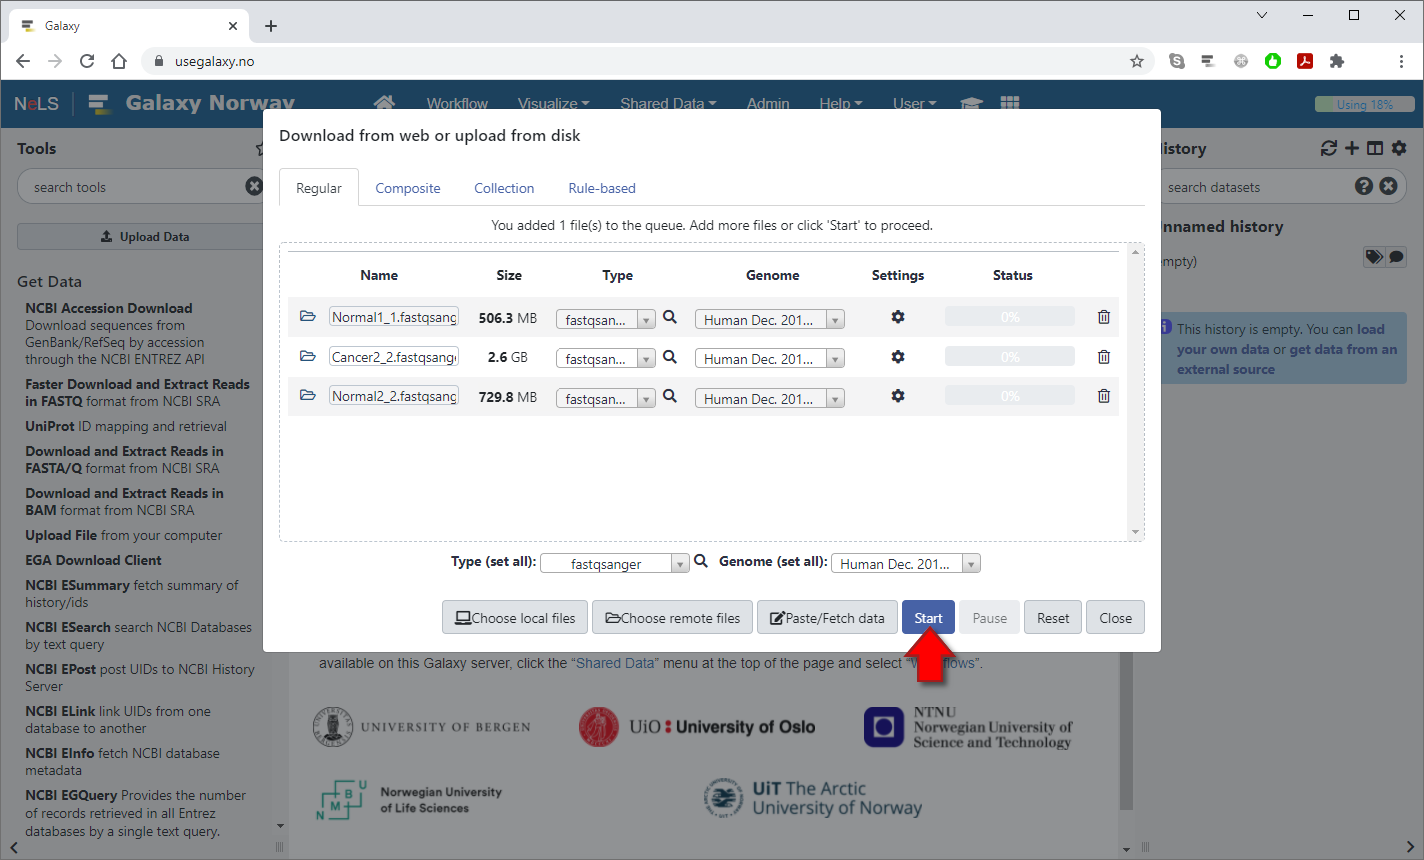
Finally, press the "Start" button to import the selected files into your history
Exporting files to NeLS Storage
1 / 5
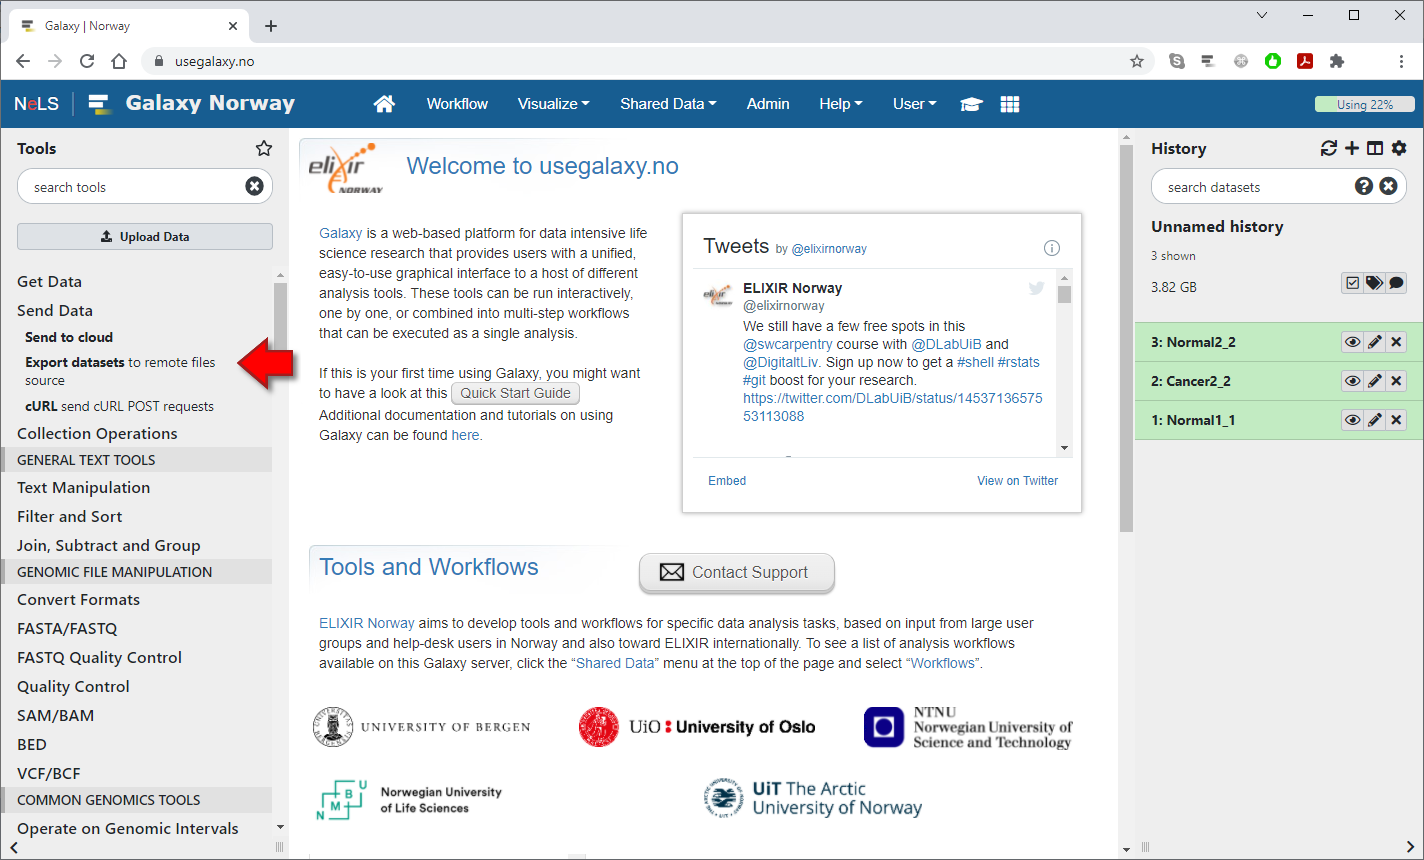
To export individual datasets from your current Galaxy history into the NeLS Storage, select the "Export datasets to remote files source" tool under the "Send Data" section in the Tools Panel
2 / 5

Choose which datasets to export from the list and then press the "Select" button under "Directory URI"
3 / 5
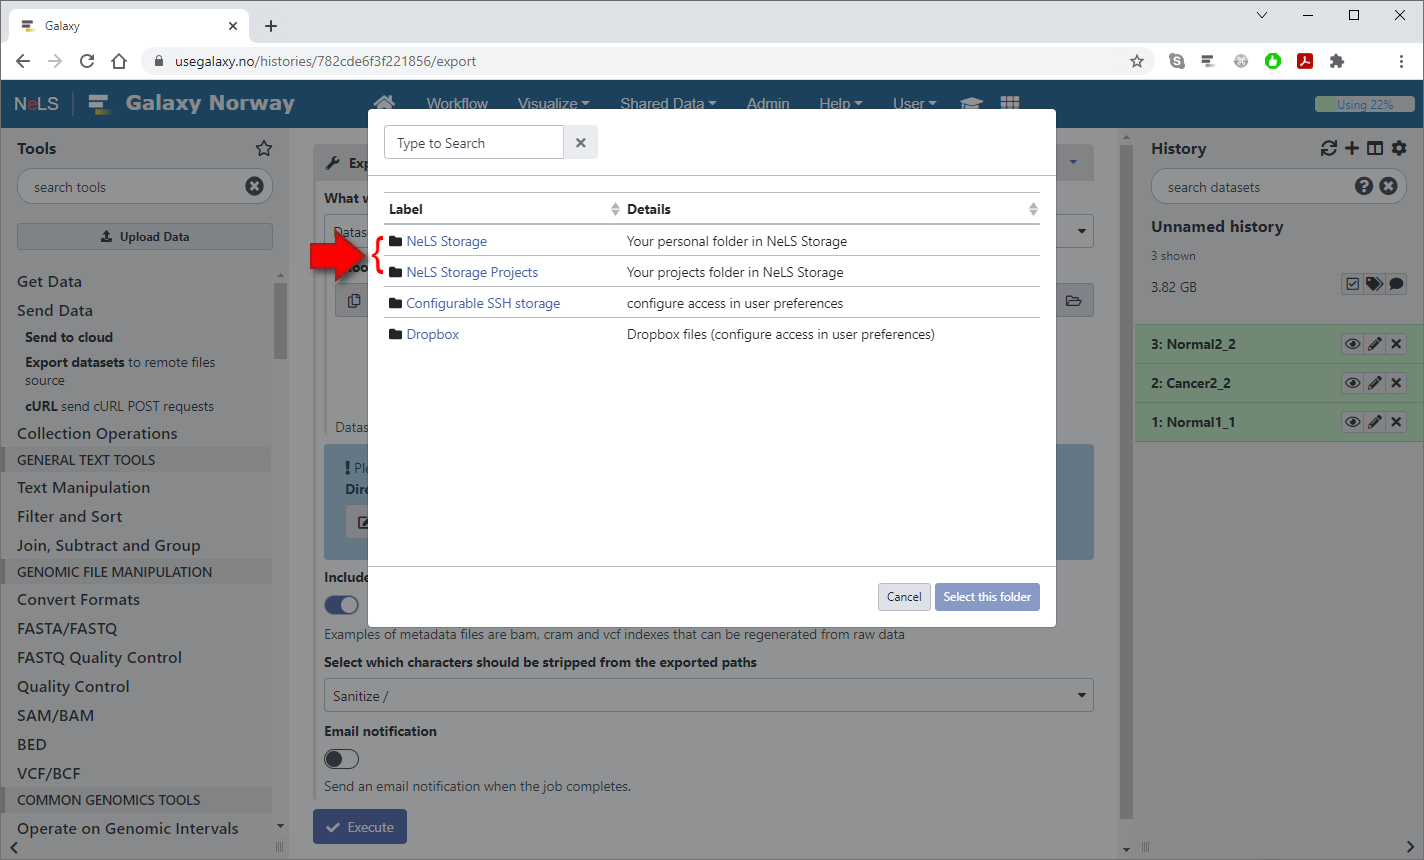
A popup dialog will display the available remote data storages.
Select "NeLS Storage" or "NeLS Storage Projects" to export files to either your Personal folder or your Projects folder in NeLS
Select "NeLS Storage" or "NeLS Storage Projects" to export files to either your Personal folder or your Projects folder in NeLS
4 / 5

Navigate into the folder where you want to store the files and then press the "Select this folder" button
5 / 5

After you have selected the destination, press the "Execute" button to start the export job
Exporting histories to NeLS Storage
1 / 5
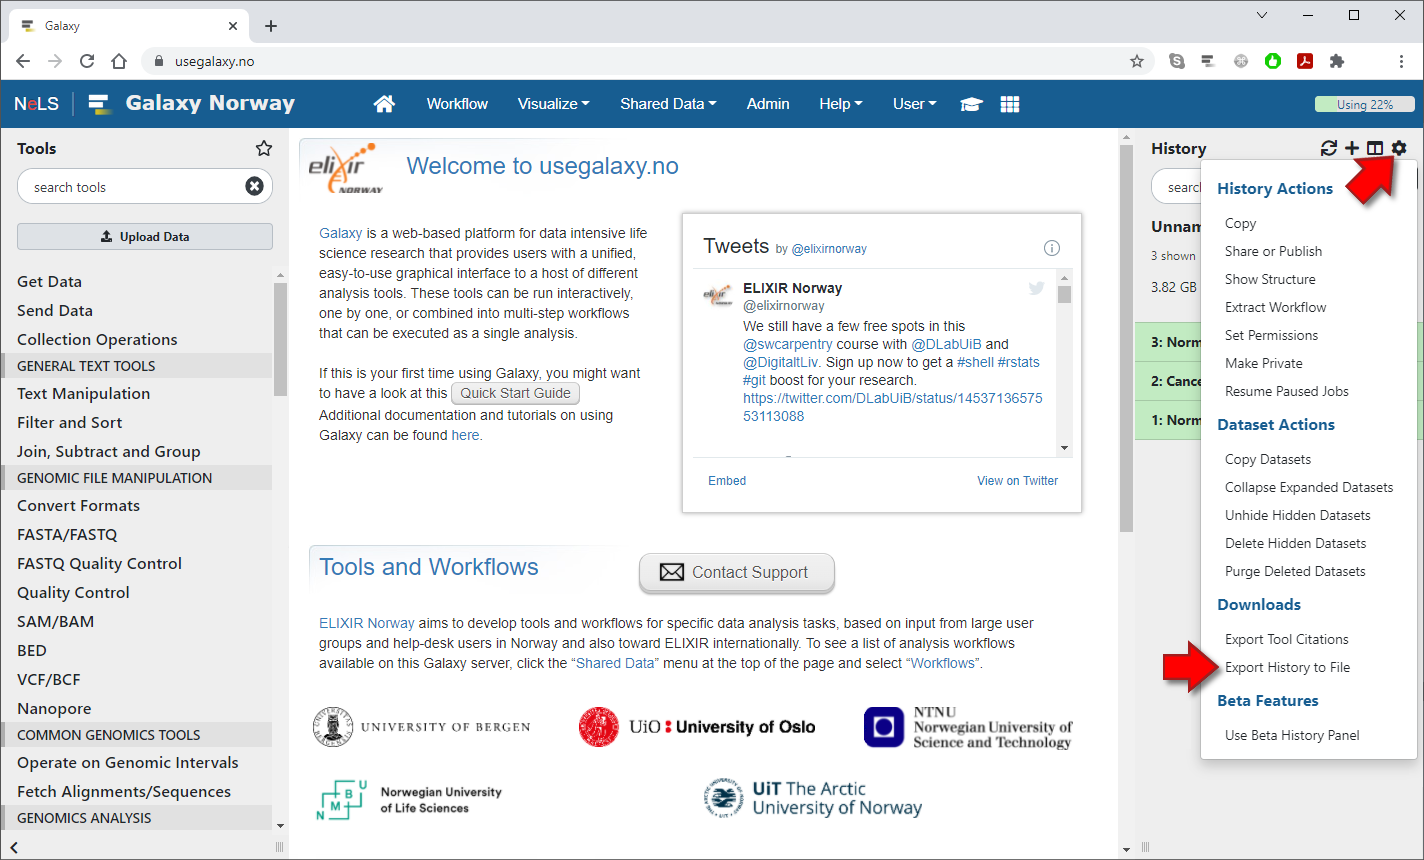
To export your current history to NeLS Storage, press the cogwheel button in the top right corner of the history panel to bring up the History Options menu, and then select "Export History to File"
2 / 5
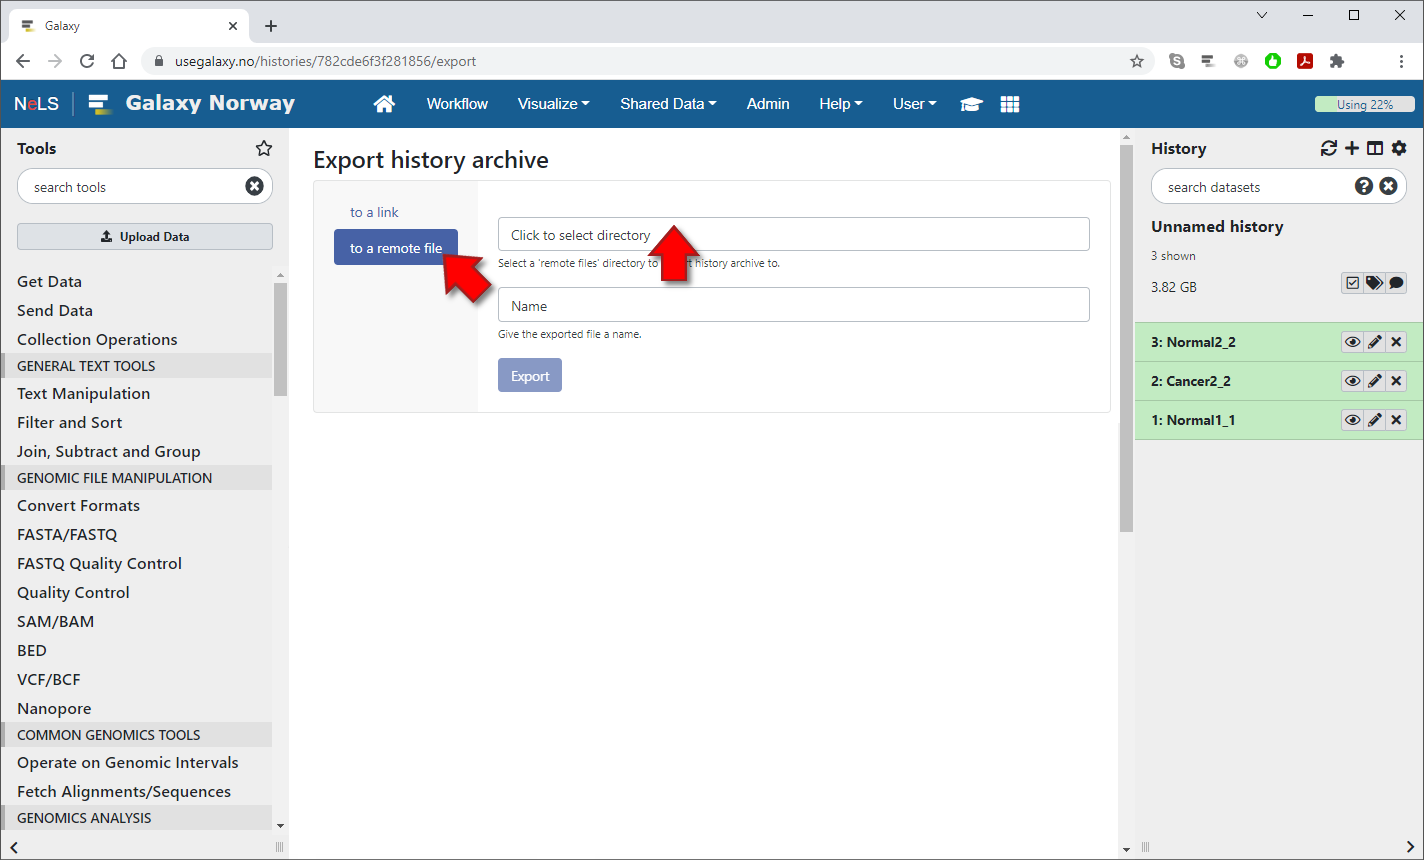
Click on "to a remote file" in the left column and then click on the first of the two text fields to select a destination for the history
3 / 5
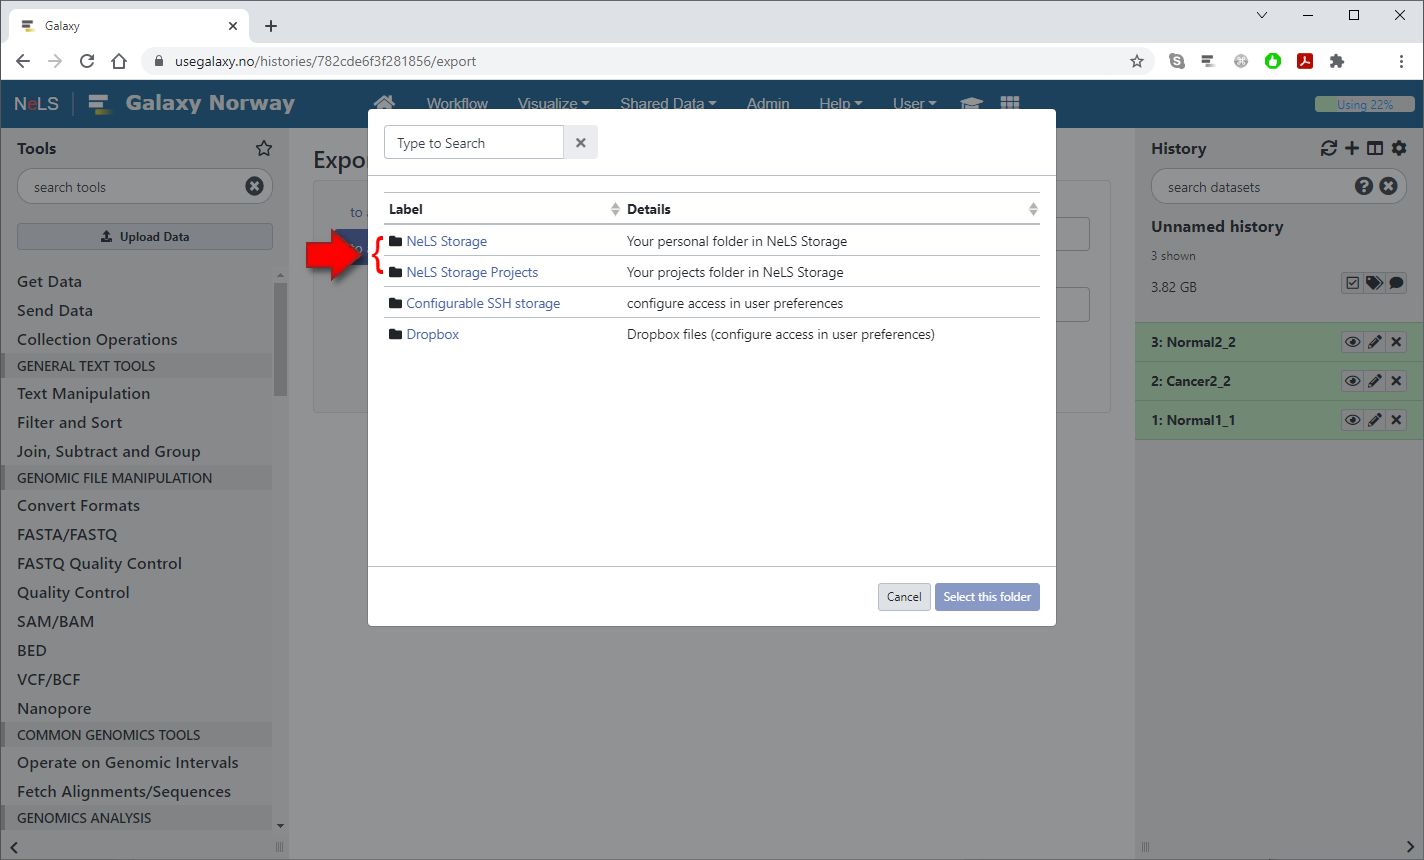
A popup dialog will display the available remote data storages.
Select "NeLS Storage" or "NeLS Storage Projects" to export the history to either your Personal folder or your Projects folder in NeLS
Select "NeLS Storage" or "NeLS Storage Projects" to export the history to either your Personal folder or your Projects folder in NeLS
4 / 5
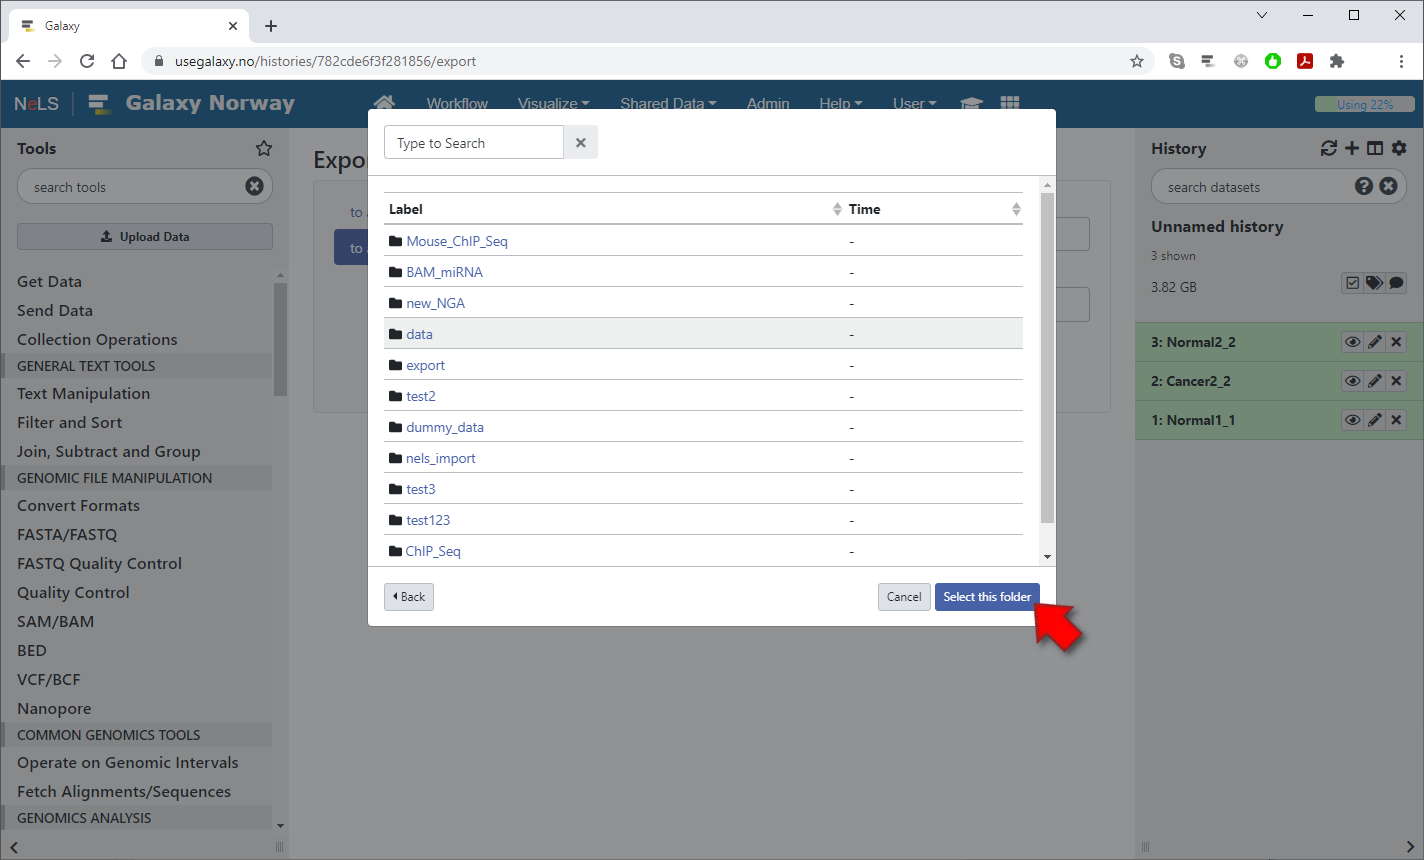
Navigate into the folder where you want to store the history file and then press the "Select this folder" button
5 / 5

Enter a filename for the history in the bottom textfield and then press "Export" to start the export job in the background
Importing histories from NeLS Storage
1 / 6
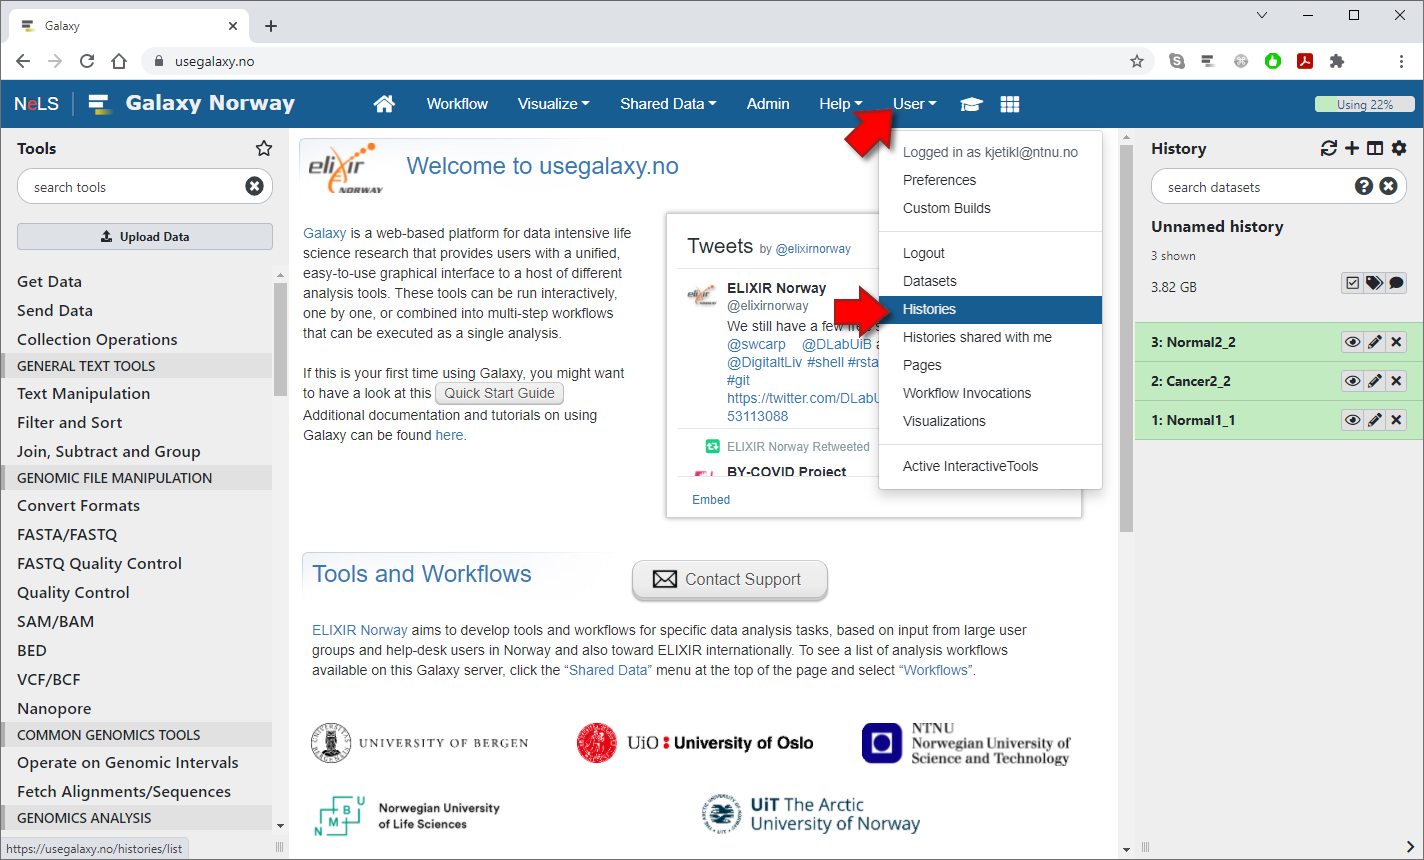
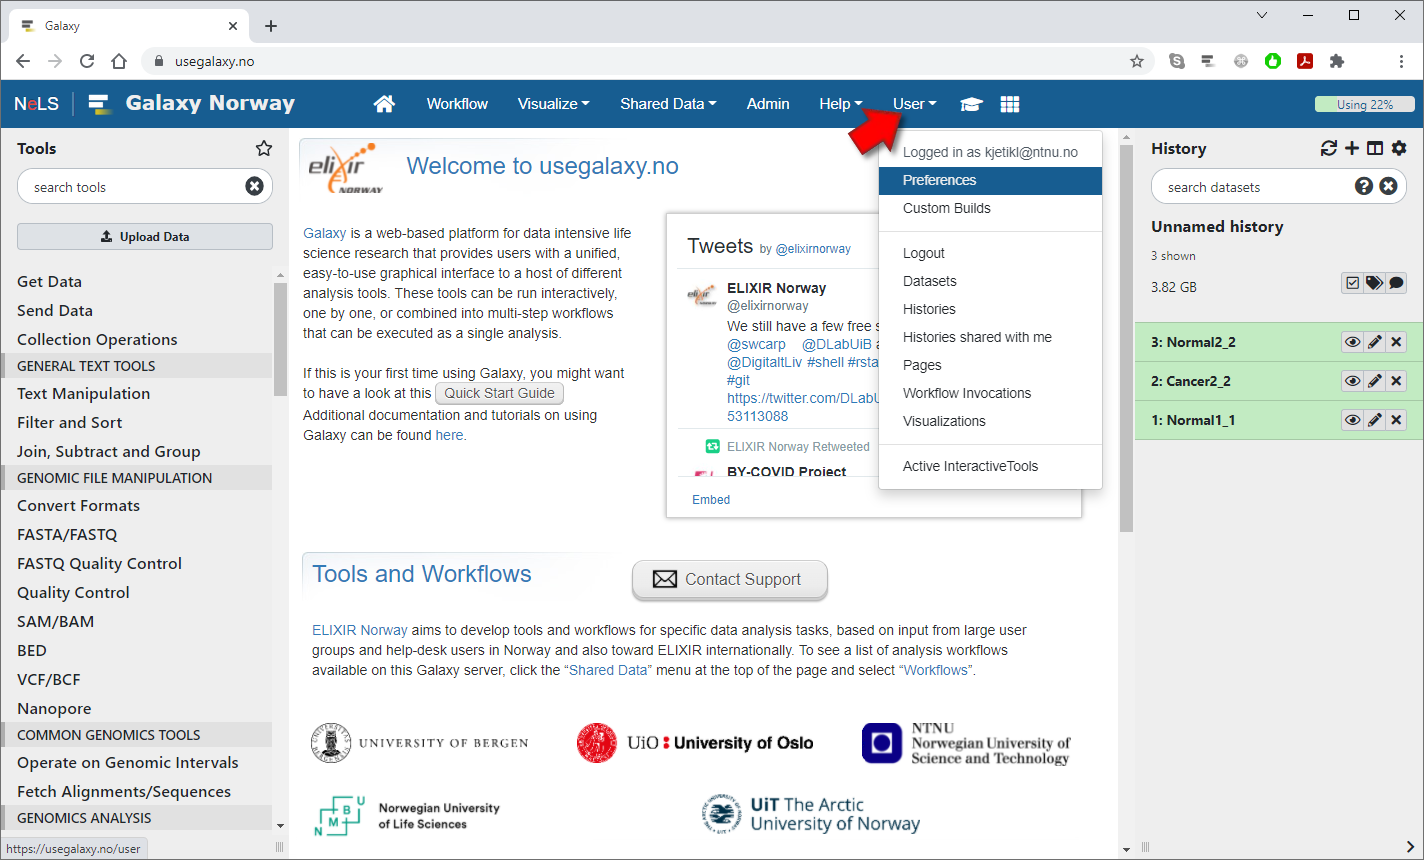
To import a history file from NeLS Storage into Galaxy, select "Histories" from the "User" menu at the top of the page
2 / 6

On the "Saved Histories" page, press the "Import from file" button in the upper-right corner
3 / 6
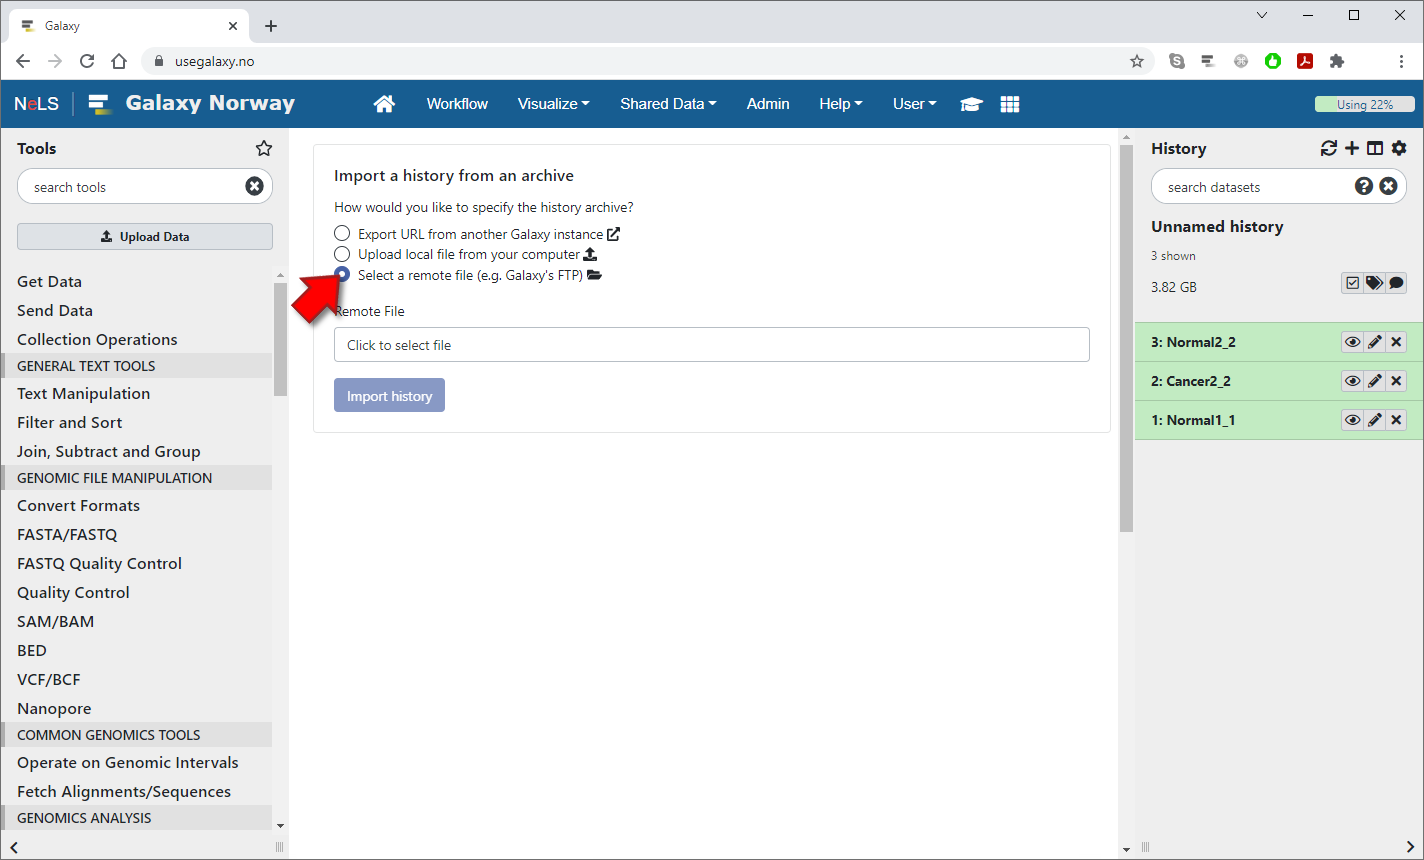
Choose the "select a remote file" option in order to import from a remote data storage
4 / 6
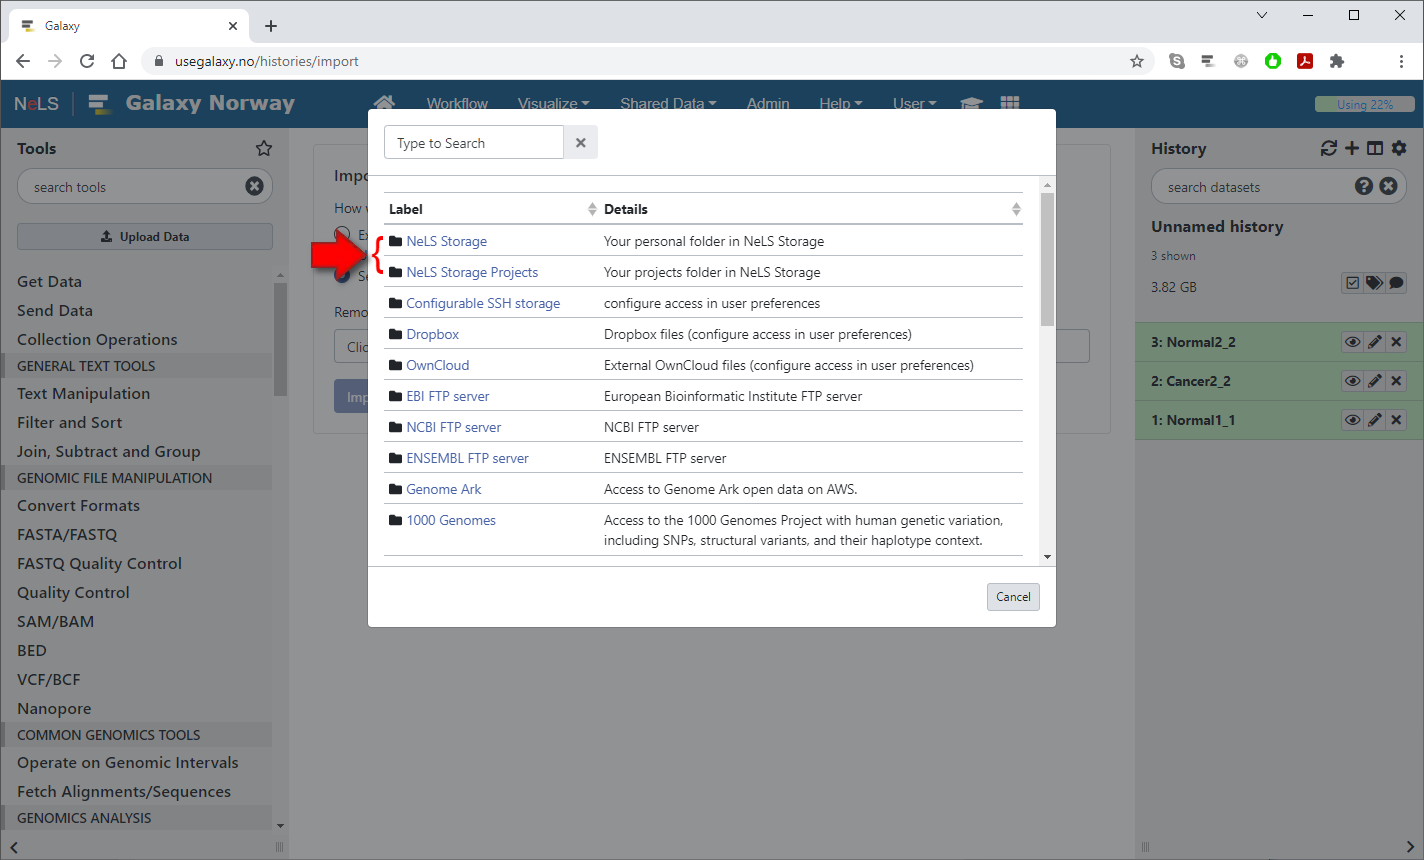
Select "NeLS Storage" or "NeLS Storage Projects" to import a history from either your Personal folder or your Projects folder
5 / 6
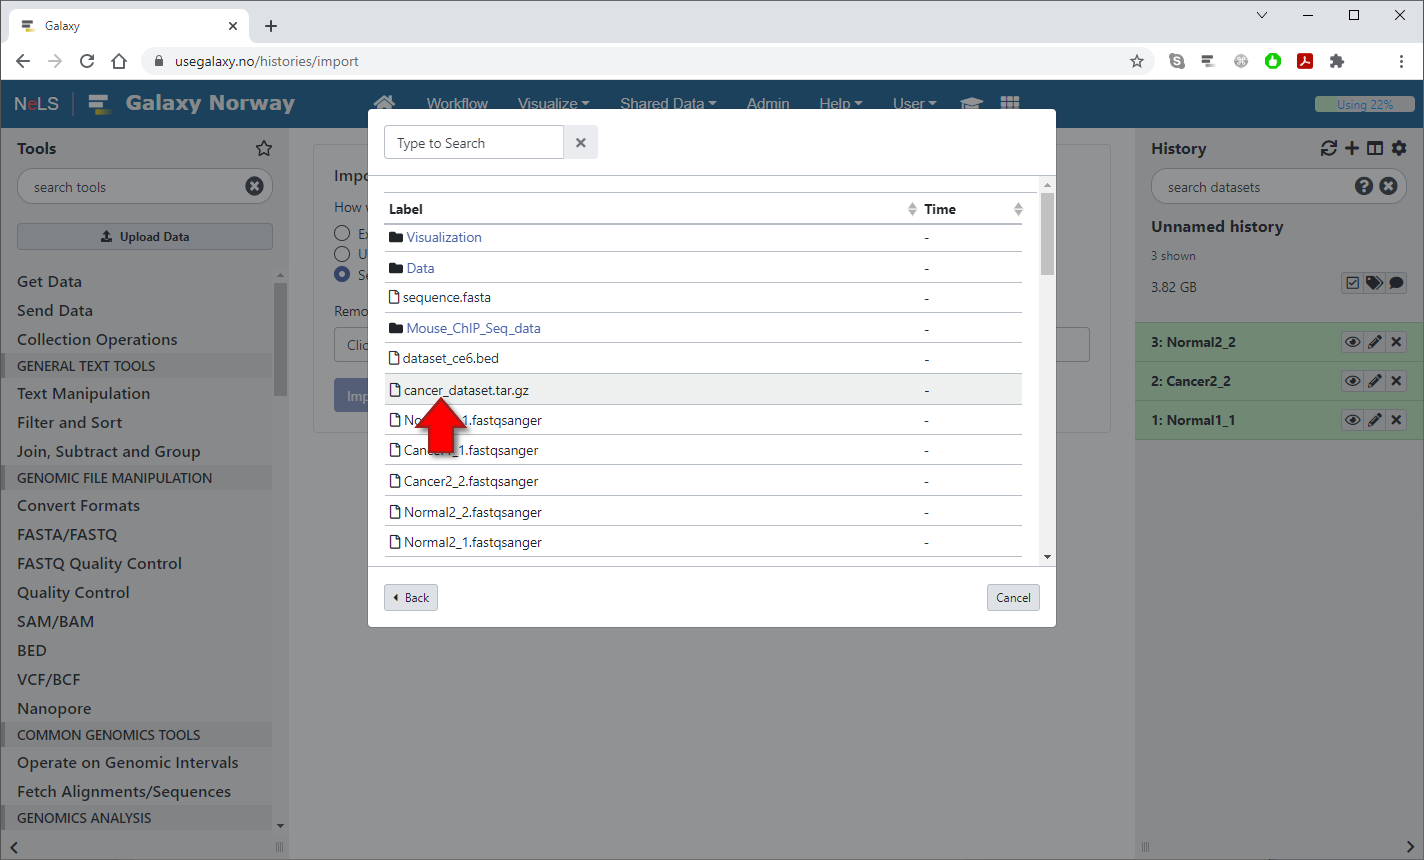
Click on a folder to navigate into it or click on a history file to select it. (Selecting a file will immediately close the dialog)
6 / 6

Press the "Import history" button to start importing the history in the background. Note that Galaxy will not switch to this history or notify you when the import is completed, but you can select which history to use from the "Saved Histories" page afterwards.
Configurable SSH storage
1 / 4
If you have your own server with SSH access, you can configure that as an additional remote storage server under "Preferences" in the "User" menu
2 / 4
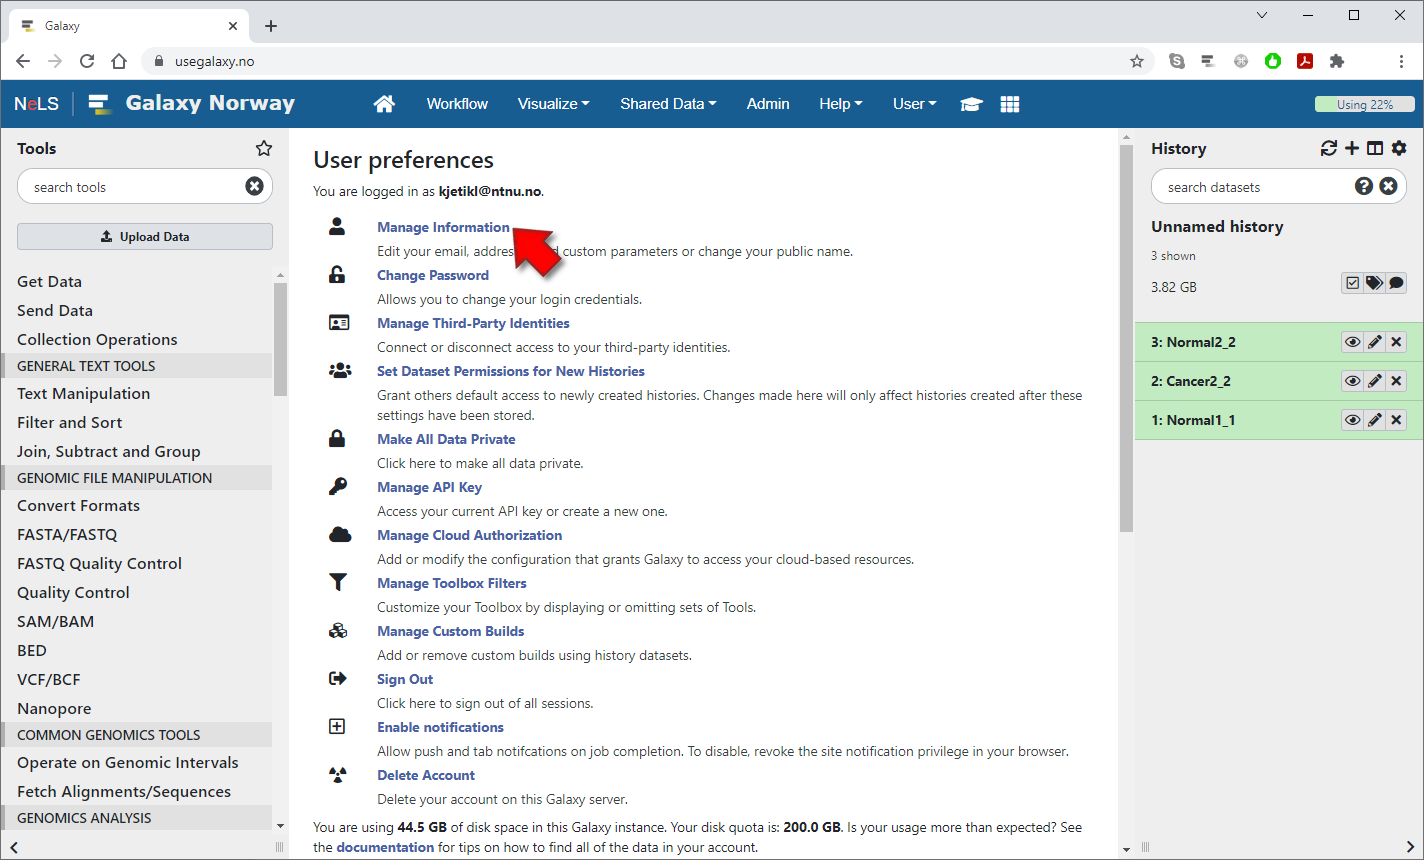
Click on "Manage Information" at the top of the User Preferences page
3 / 4
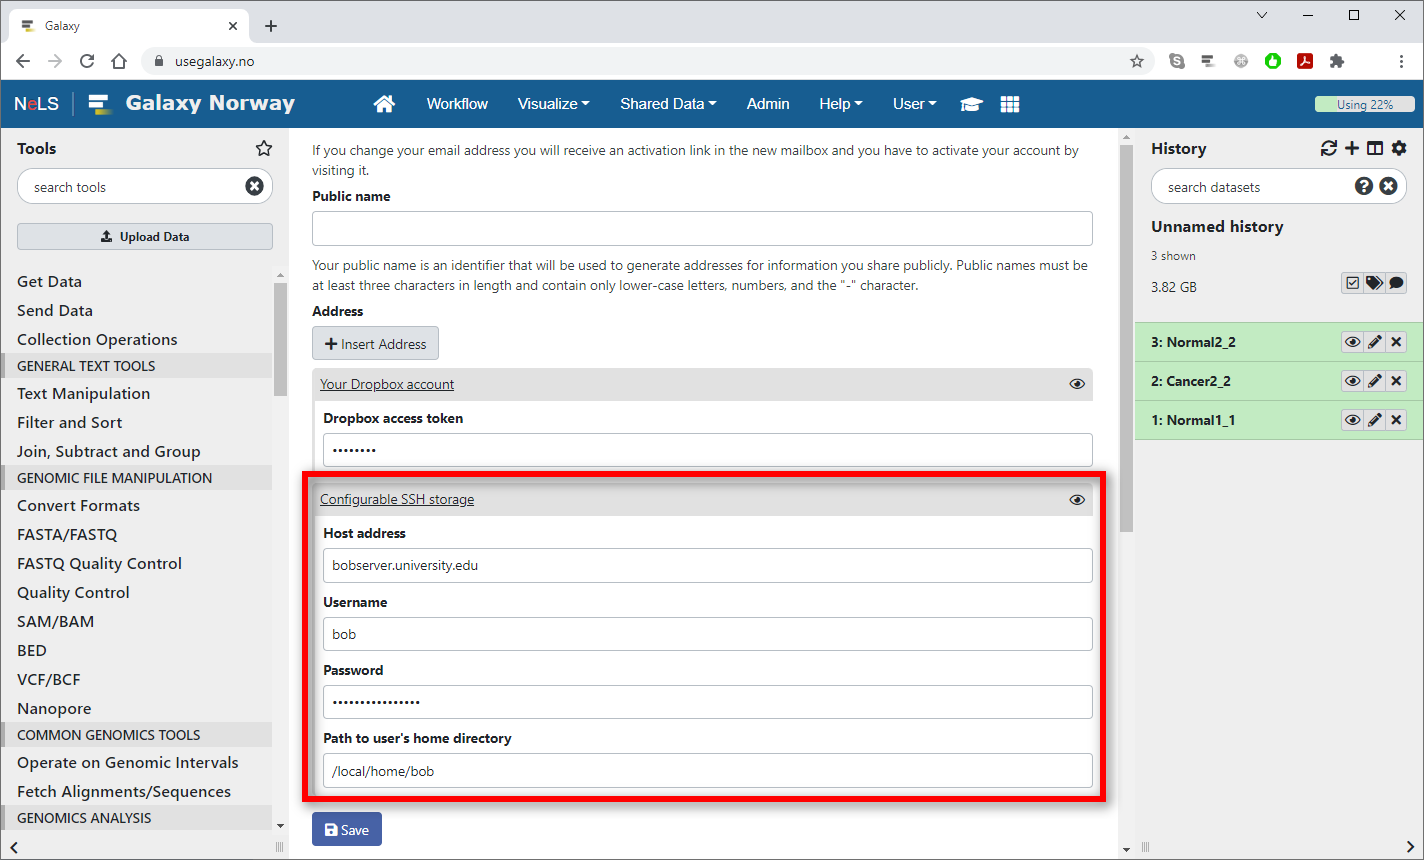
Enter the address of the server, plus your username, password and path to your home directory in the "Configurable SSH storage" block on the Manage Information page. Press the "Save" button afterwards.
4 / 4
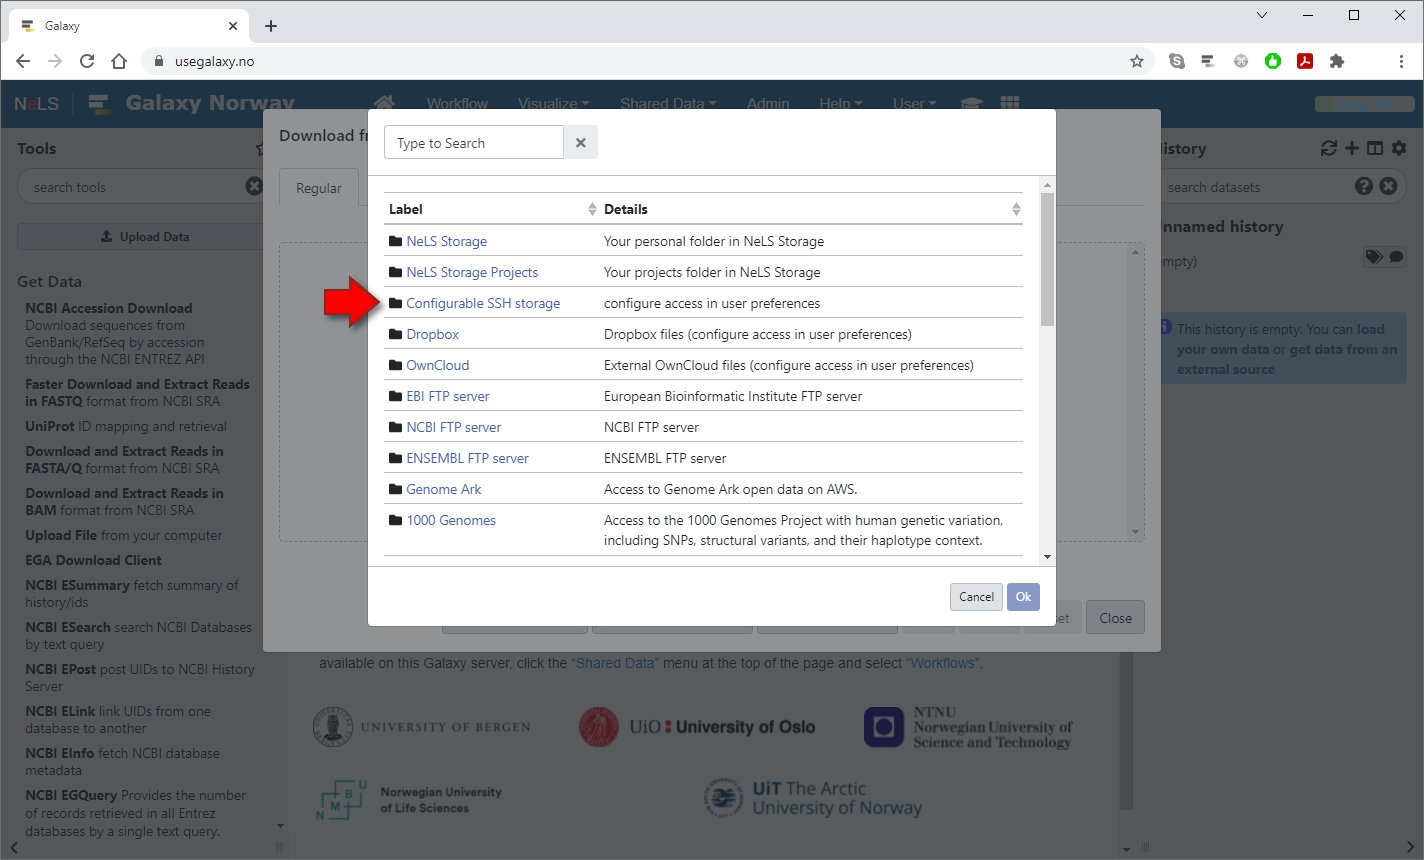
The storage will be named "Configurable SSH storage", and you can import and export files and histories to this server the same way you do with NeLS Storage
Note: If you don't have a NeLS Storage account already, you must first log in to nels.elixir.no to create one automatically!